Loop Mode
You’re on a trade show booth and need to run the same 360 Video over and over? The loop mode is for you.Start the app, swipe up, select loop mode, select the video to loop and you’re set, no more issues with users accidentally touching the trackpad and derailing the presentation. Click once on the back button to restart the video. Click twice on the back button to get out of loop mode.
Demo Mode
You’re demoing your content to an audience with no GearVR experience? Demo mode is for you. Swipe up to select Demo Mode and the Play VR app will disable the trackpad when playing 360 Video. The user will be able to select another video once the playing video finishes. No more issues with users accidentally stopping or pausing presentations.Advanced Mode
This is our full featured mode for advanced users. Lo and behold, you can now fast forward and rewind, swipe up to access the file details, navigate chapters etc.If you’re a power user, this mode is for you. Just setup a simple text file to add the additional metadata to your content.
Play VR Videos
We support UHD 3840×1920 360 Videos so go ahead and drop your content into the root of the Oculus 360 Video folder on your device and experience the full power of the Play VR app. You’ll be able to organize your content into folders or themes to be used when in Demo mode.Show your own background
We’re very happy for you to use our default background shot of the Sydney Opera House, but you’re more then welcome to use your own background. Just drop a 4K “background.jpg” equirectangular panorama into the Oculus 360Video folder and you’re set. That image will be displayed as the Play VR background.Play your own content
While we’ve made some of our content available for you to experience (see below), you can use Play VR for just your own content too. We built this app after doing 1,000’s of client and show demo’s. This app is for us, but we figured you might enjoy it too, so go for it.Download sample 360 Video content from us:
We made available sample content for you to enjoy when running the Play VR app on your Gear VR.
Panedia Show Reel 2016
File Size: 637MB
This zipped folder contains 3 files:
1) The .mp4 360 Video file
2) A .png thumbnail for the Play VR
3) a .pvr thumb for the Oculus player
Download and extract the files to:
Oculus/360videos folder on your device.
Panedia Show Reel 2015
File Size: 596MB
This zipped folder contains 3 files:
1) The .mp4 360 Video file
2) A .png thumbnail for the Play VR
3) a .pvr thumb for the Oculus player
Download and extract the files to:
Oculus/360videos folder on your device.
Vivid Sydney 2015
File Size: 412MB
This zipped folder contains 3 files:
1) The .mp4 360 Video file
2) A .png thumbnail for the Play VR
3) a .pvr thumb for the Oculus player
Download and extract the files to:
Oculus/360videos folder on your device.
Experience New Zealand
File Size: 240MB
This zipped folder contains 3 files:
1) The .mp4 360 Video file
2) A .png thumbnail for the Play VR
3) a .pvr thumb for the Oculus player
Download and extract the files to:
Oculus/360videos folder on your device.
Download sample 360 Panorama content from us:
We made available sample content for you to enjoy when running the Play VR app on your Gear VR.

NYC – Highline Panos
File Size: 46MB
This zipped folder contains 14 Panos:
1) One .jpg file for each pano (4K)
2) One .png thumbnail for each pano
Download and extract the files to:
Oculus/360videos folder on your device.
We recommend you create a Panos folder and include a subfolder for each set of panos to make it easy to navigate around in the Play VR interface.
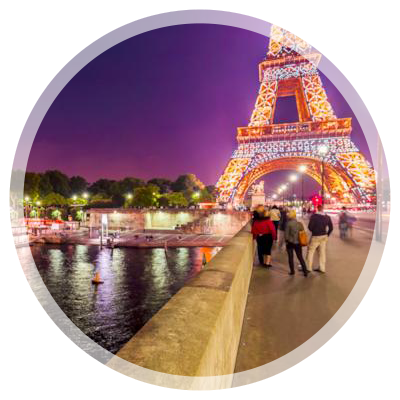
Paris – Eiffel Tower Panos
File Size: 51MB
This zipped folder contains 20 Panos:
1) One .jpg file for each pano (4K)
2) One .png thumbnail for each pano
Download and extract the files to:
Oculus/360videos folder on your device.
We recommend you create a Panos folder and include a subfolder for each set of panos to make it easy to navigate around in the Play VR interface.
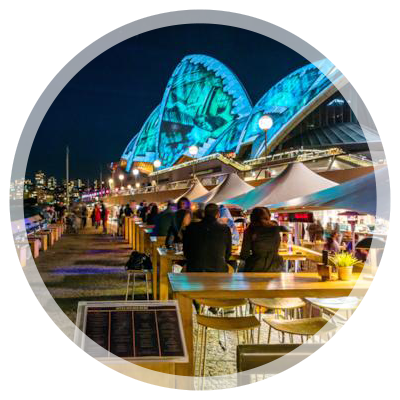
Sydney- SOH Vivid Panos
File Size: 45MB
This zipped folder contains 17 Panos:
1) One .jpg file for each pano (4K)
2) One .png thumbnail for each pano
Download and extract the files to:
Oculus/360videos folder on your device.
We recommend you create a Panos folder and include a subfolder for each set of panos to make it easy to navigate around in the Play VR interface.
Play VR is free:
FAQ
Can I get invited to try out the Play VR app?
Is the Play VR app free of charge?
Why are you making the Play VR app Free of charge?
How do I start the Play VR app?
That’s it, really…
Where can I add my own VR content?
Play VR is designed to look for content on both Oculus 360videos folders, in the internal memory or the MicroSD card if your mobile device supports it.
I really like your Circle Thumbs, how can I create my own?
1) Download the following Photoshop Template:
2) Load any 400x400px image on a layer at the bottom.
3) Click the Mask Icon on Layer 1 and drag it over your image layer.
4) Save it as a PNG file with transparent background.
5) Rename the file with exactly the same name as your video or still file and you’re set.
How can I change the default Background image?
To do so, just drop a 4K jpeg file named “background.jpg” on the Oculus/360Videos folder on your device and you’ll be set.
Also, we made available 51 panoramas for download. You’re welcome to grab any of those images, rename it “background.jpg” and use it as your Play VR background scene.
Can I change the default Folder Graphics?
Just add in a PNG file 400x400px with the exact same name as the folder and Play VR will use that instead of the default folder graphics.
Example:
Folder named: “Travel”
Thumbnail should be named: “Travel.png”
That’s all.
Is there a Facebook Group where I can get Play VR support?
Just head there and post your questions. A member of our team will try to get your answers in a timely fashion, but keep in mind that we’re based on the +10 Timezone relative to Queensland, Australia.
How can I add Metadata to the files on Play VR? (Swipe Up)
a) In the first line include the exact name of the .mp4 file without the extension.
b) Add in as many lines as you need with the chapters. Simply start each chapter with (1.), (2.), etc.. and add the Chapter name and the time at the end (00:03)
c) Add a description on the next line starting with (Description: )
d) Add an Author on the next line starting with (Author: )
e) Add Copyright on the next line starting with (Copyright: )
That’s it.
You can download a sample here that works with the three 360 Videos we made available for download.
This is the contents of the “movielist.txt” file:
01 Panedia Show Reel 2015
1. Experience Carnivale on Movie World Gold Coast: 00:03
2. Flight Facilities at Sydney Opera House: 00:28
3. Vivid Sydney 2015: 00:54
4. Experience Humpback Whales: 01:25
5. Experience New Zealand: 01:43
6. Experience Surfers Paradise Fireworks: 02:19
Description: This is a small sample of the content we produced in 2015 with built in chapters for easy navigation in Play VR Advanced Mode.
Author: Panedia.com
Copyright: Panedia.com
02 Panedia Vivid Sydney 2015
Description: Experience the cuty of Sydney during the Vivid 2015 Festival
Author: Panedia.com
Copyright: Panedia.com
03 Panedia Experience New Zealand
Description: Experience New Zealand
Author: Panedia.com
Copyright: Panedia.com
Play VR is free:
Play VR Support
The contact form below will allow you to contact the Play VR team to get support.
You could also jump on our Facebook Group and get support from peers and members of our team as well:
